

Set up your environment, once, for your whole company
Your environment is your company’s own Transportial platform. Its settings decide how it looks, which functions your team sees, and how planning, routing, finance and AI behave, for every user at once. This guide shows each screen and what to fill in.
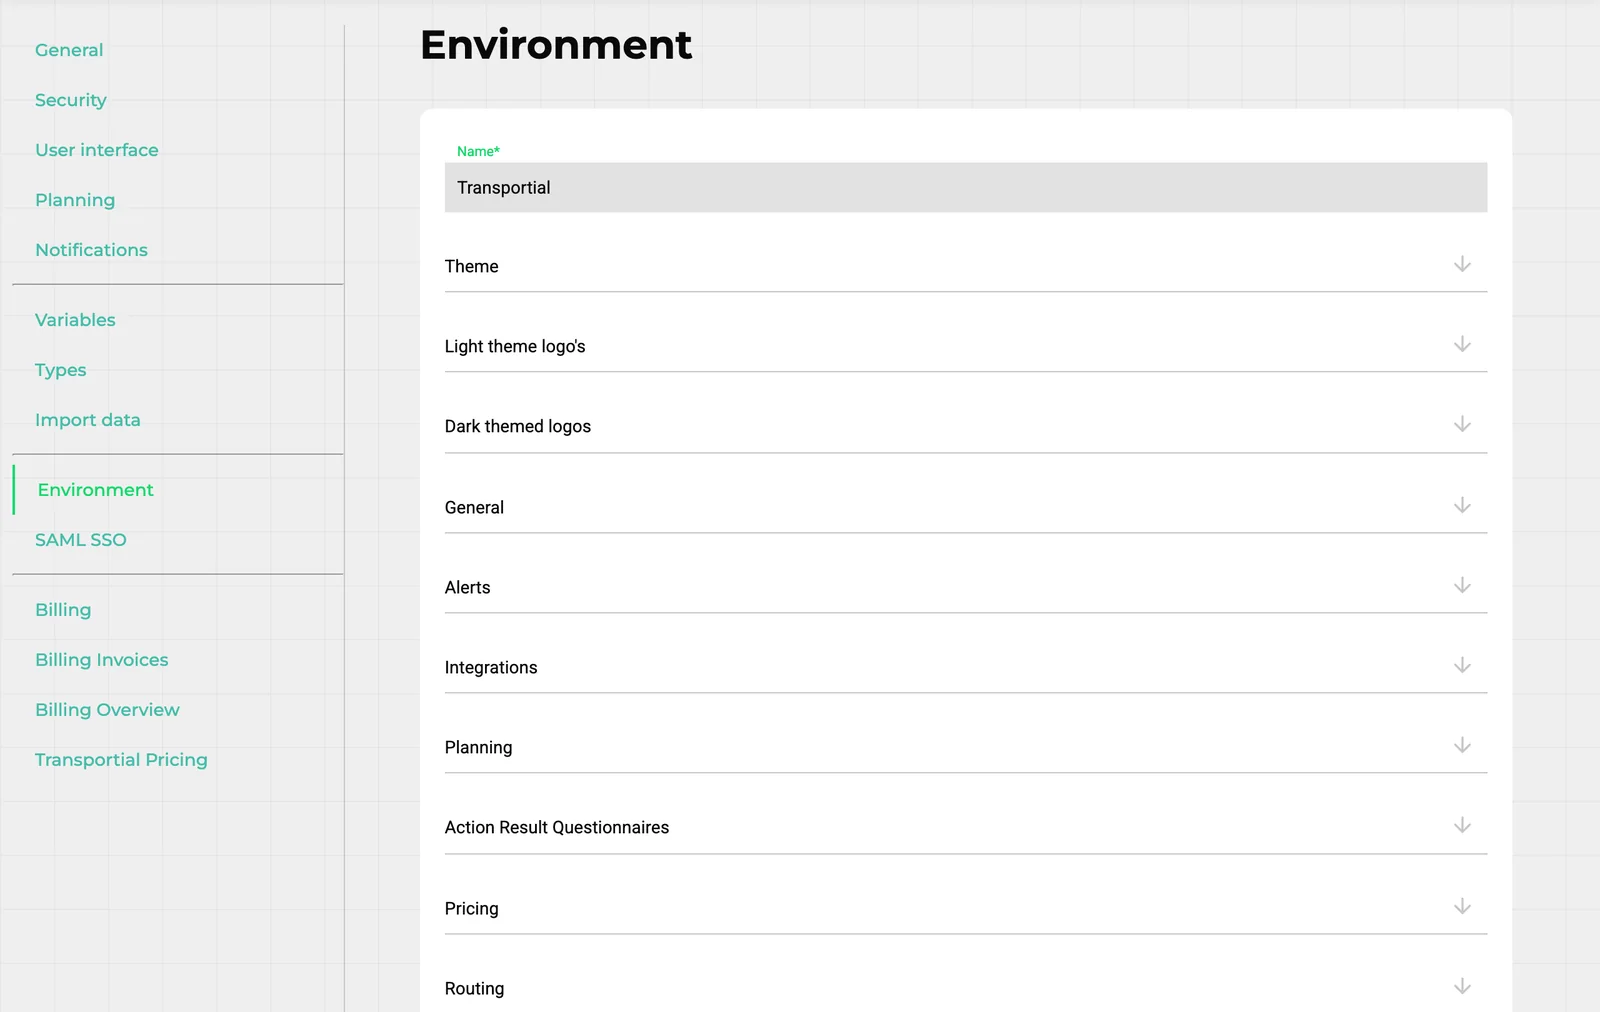
There are two ways in. The setup wizard asks plain questions about your company and configures the platform for you. Settings › Environment is the complete control panel behind it, where every choice the wizard made can be refined. Most companies run the wizard first and fine-tune here afterwards.
Two ways to set it up
Both change the same settings. Use the wizard to get started quickly and the Environment tab for the details.
The setup wizard
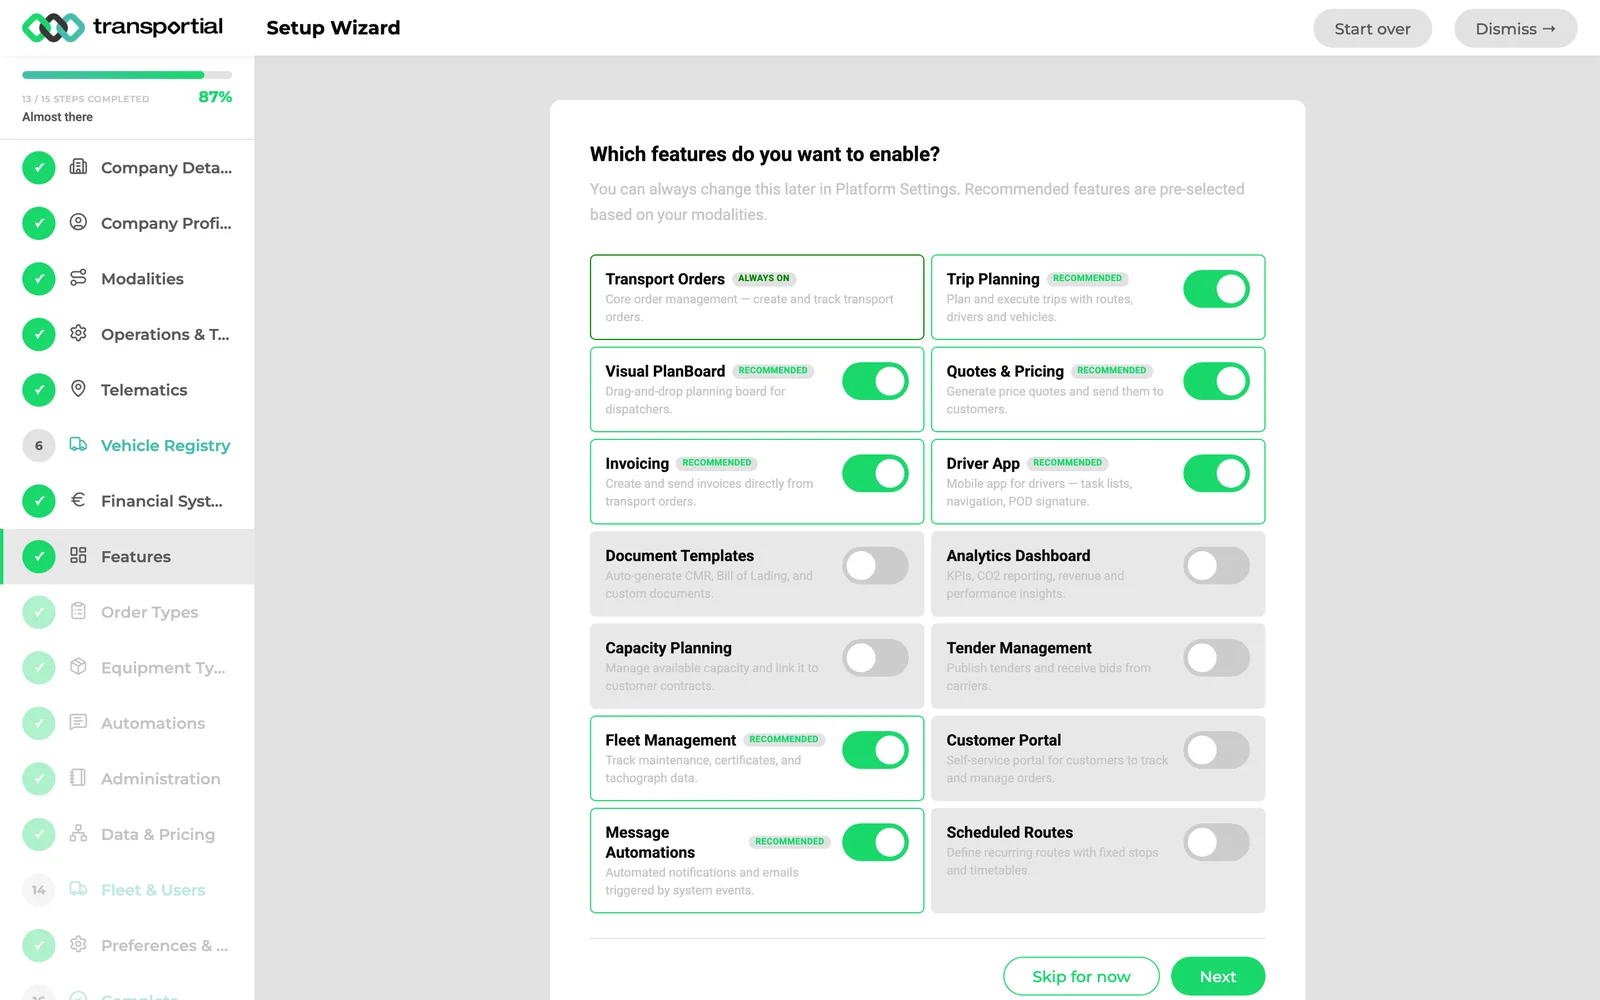
A guided tour through your company, fleet and way of working. New platforms open it automatically.
Fills in company details, modalities, telematics and your financial system.
Switches on the functions you need, with recommendations based on your modalities.
Creates order and equipment types, automations, your administration and fleet.
Can be reopened or restarted at any time without losing what it created.
Settings › Environment
Every platform-wide setting on one page, grouped in 24 sections that open with a click.
Branding: colors for light and dark mode and five kinds of logo.
Region, functions, planning rules, routing engines, AI, customer portal and more.
Open and change several sections at once.
One Save button at the bottom applies everything to every user.
Who can change it: the Environment tab is shown to internal users with role level 1000 or higher, usually the platform owner and administrators. Changes apply to everyone on the platform as soon as they are saved.
Start with the setup wizard
Most of the setup in about ten minutes, by answering questions instead of looking for settings.
Open it
New platforms start in the wizard. Later, open it from the banner on the dashboard (Start Setup Wizard or Continue Setup), or from Settings › Environment › UI Settings › Setup wizard › Open wizard.
Answer step by step
The menu on the left shows every step and your progress. Skip a step with Skip for now and come back to it later.
Choose your functions
In Features, switch on what your company uses. Recommended functions are already selected based on your modalities. Transport orders are always on.
Finish, or restart later
Dismiss closes the wizard and keeps your progress. Restart setup clears only the answers; everything the wizard created is kept.
- Company Details
- Company Profile
- Modalities
- Operations & Tools
- Telematics
- Vehicle Registry
- Financial System
- Features
- Order Types
- Equipment Types
- Automations
- Administration
- Data & Pricing
- Fleet & Users
- Preferences & Goals
- Complete
Settings › Environment, step by step
The order most companies follow. Every section starts closed: click its name to open it, and click Save at the bottom when you are done.
Open Settings › Environment
Open the side menu (☰, top right) and choose Settings. In the list of tabs on the left, click Environment.
At the top is the name of your platform. Below it are the sections, each a row with an arrow. Click a row to open it.
All options in the help center →Choose your colors
Open Theme. Pick a Primary color and a Secondary color for buttons, links and highlights, and the same two for dark mode.
Click a color field to open the color picker, or paste your brand colors.
All options in the help center →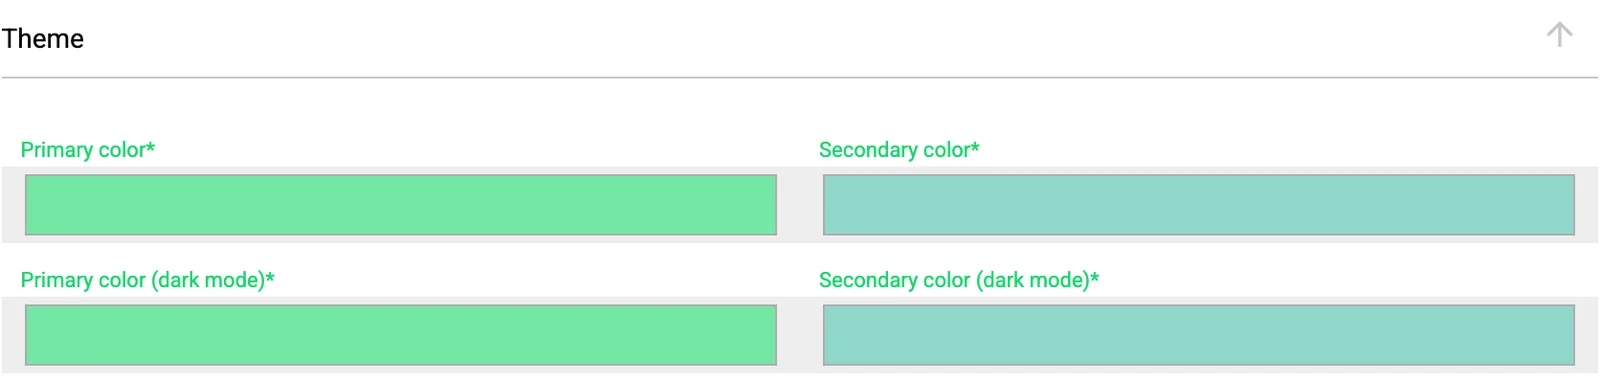
Upload your logos
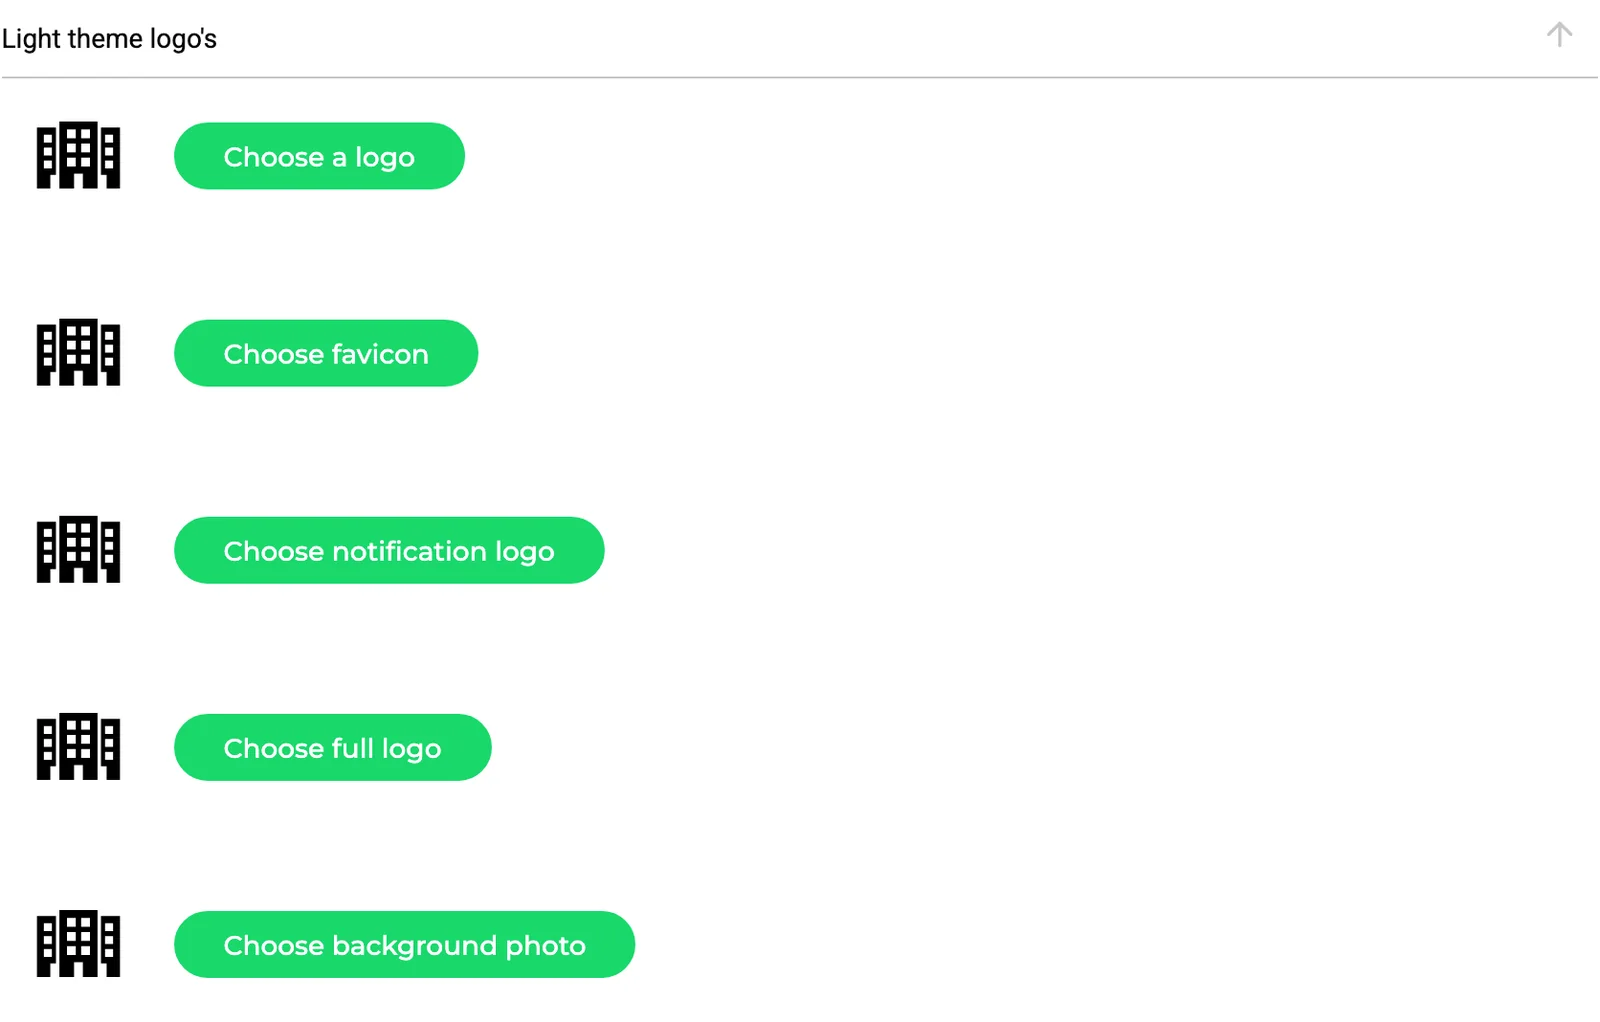
Open Light theme logos, and later Dark themed logos. Each row has a preview and an upload button.
- Choose a logo: the logo in the header.
- Choose favicon: the small icon in the browser tab.
- Choose notification logo: shown with notifications.
- Choose full logo: your complete logo, including the company name.
- Choose background photo: the background of the login page.
Set your region
Open Region and click your country under Apply a region preset. Units, currency, number, date and time formats and the time zone are filled in at once.
Change single fields if needed and check the Preview line, which shows a sample distance, weight, amount and date. If you plan across time zones, choose The stop’s local time zone under Show stop times in.
All options in the help center →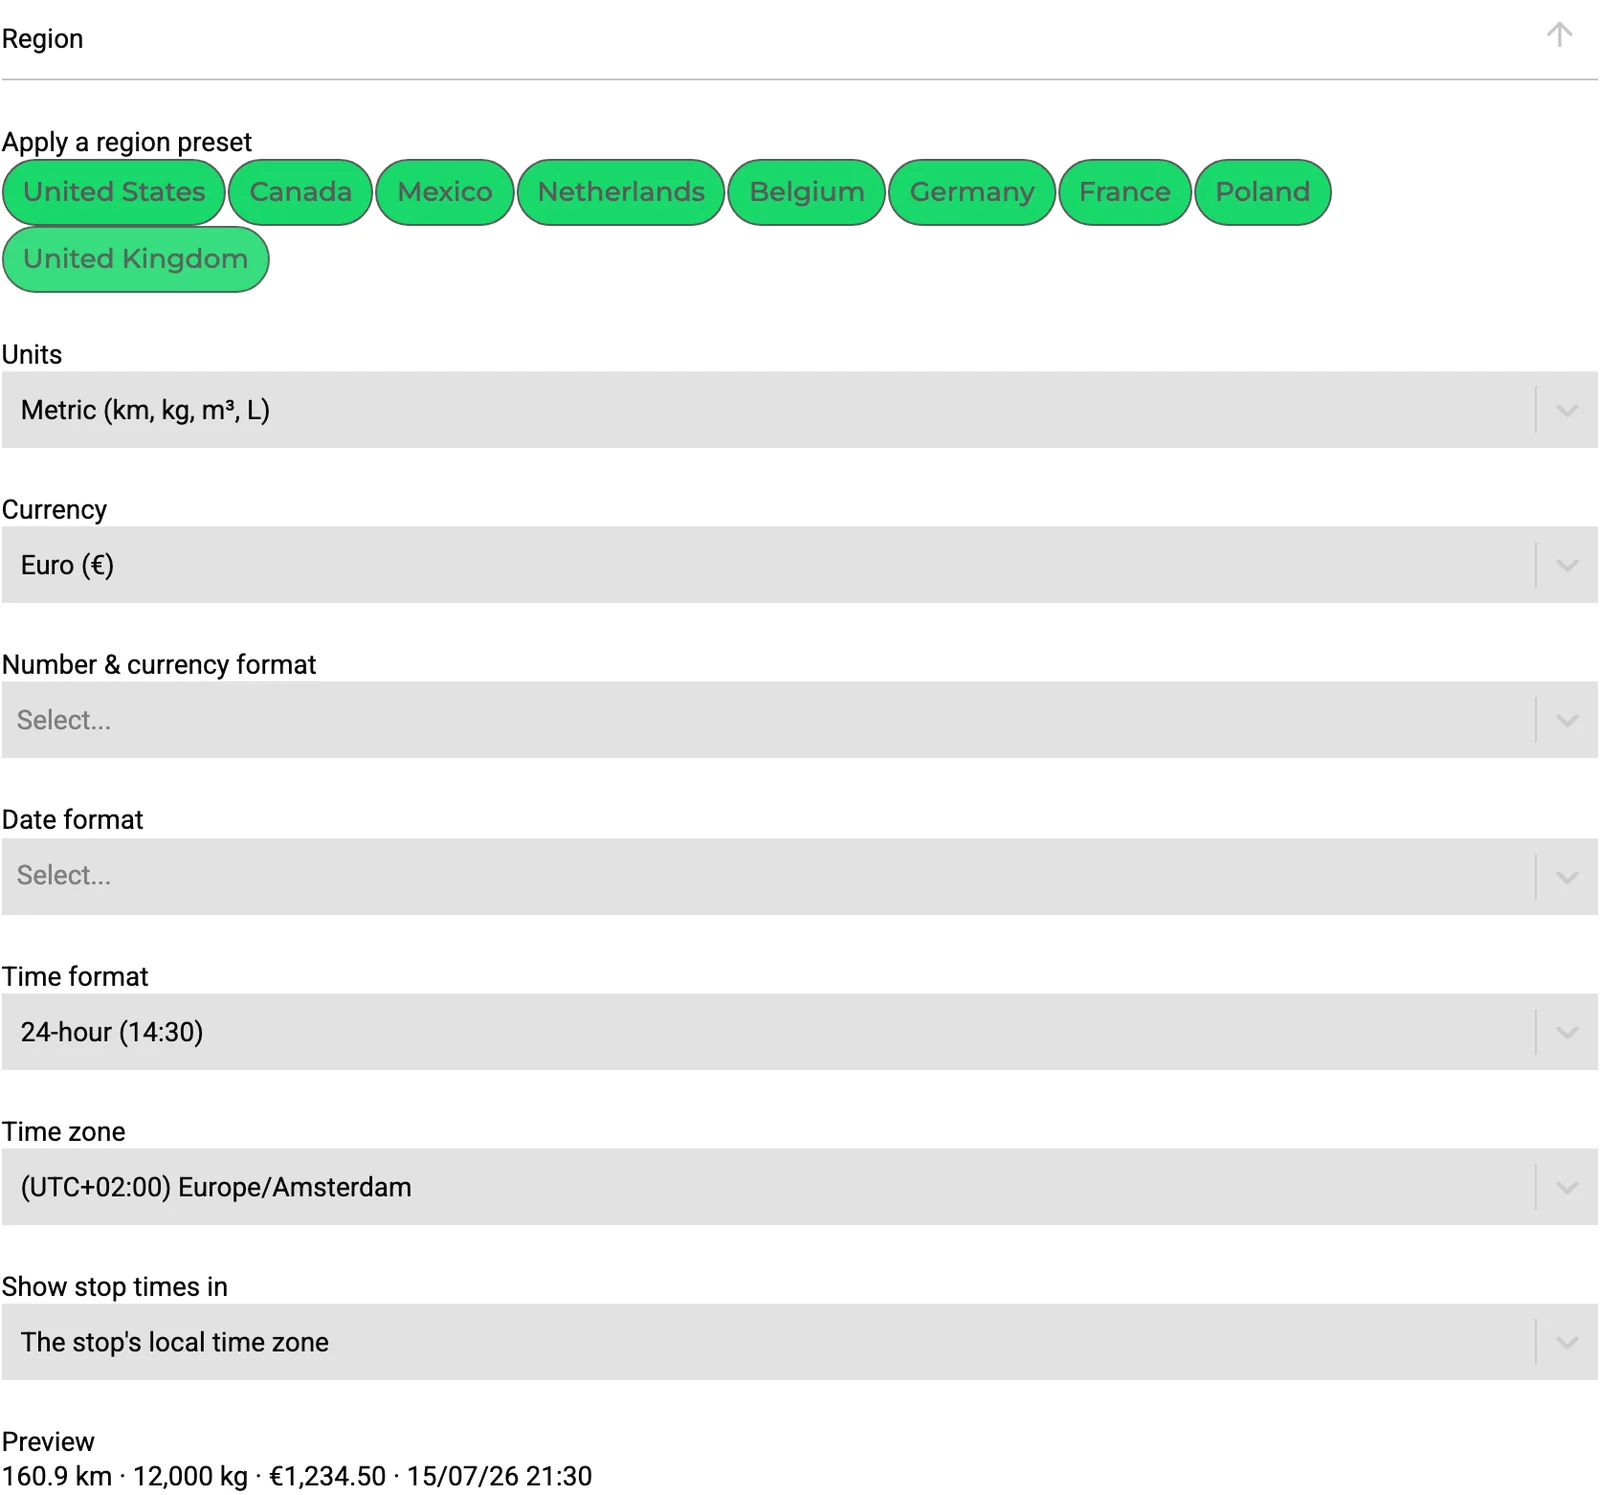
Switch on functions and set up email
Open General. Here you choose the email integration Transportial uses to send email in your name, the functions that are switched on for your platform, and the allowed sender email domains.
Some menu items, such as Workflows or the App Store, only appear when their function is on. Set up the SMTP or Exchange integration first under Integrations, then select it here.
All options in the help center →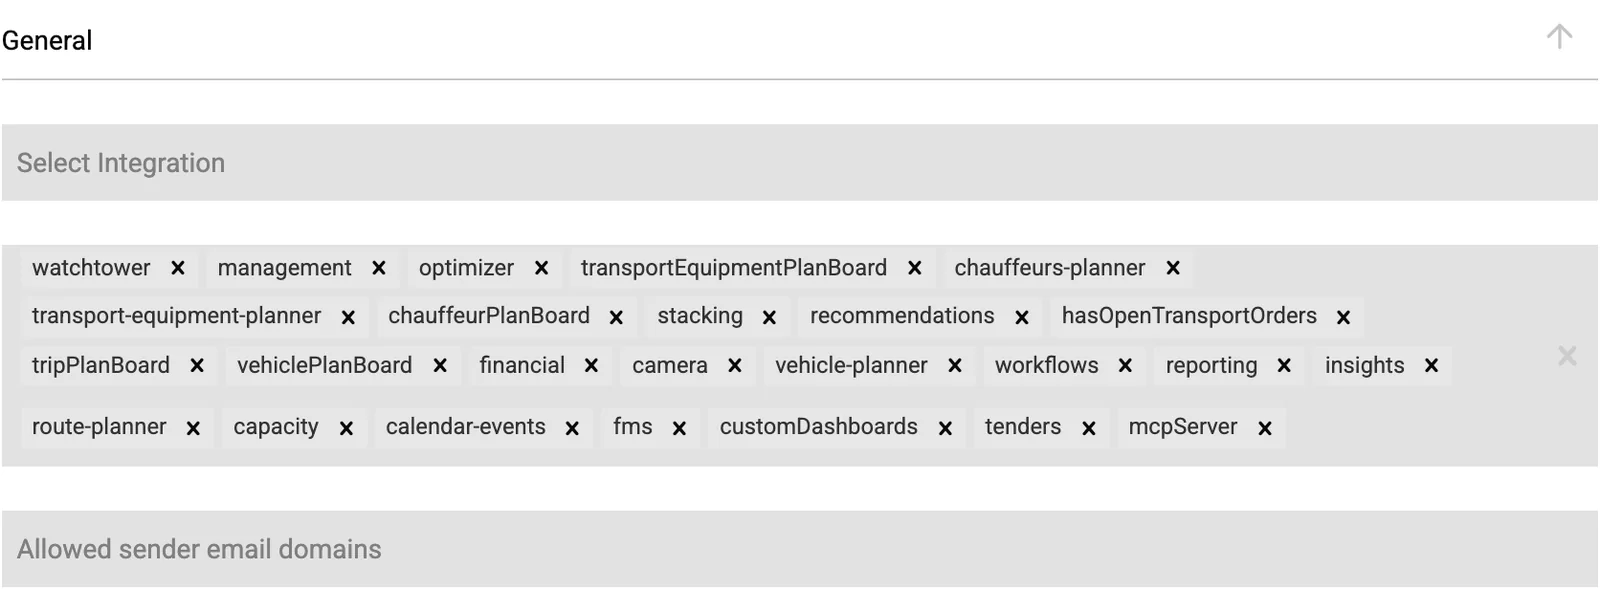
Set your planning rules
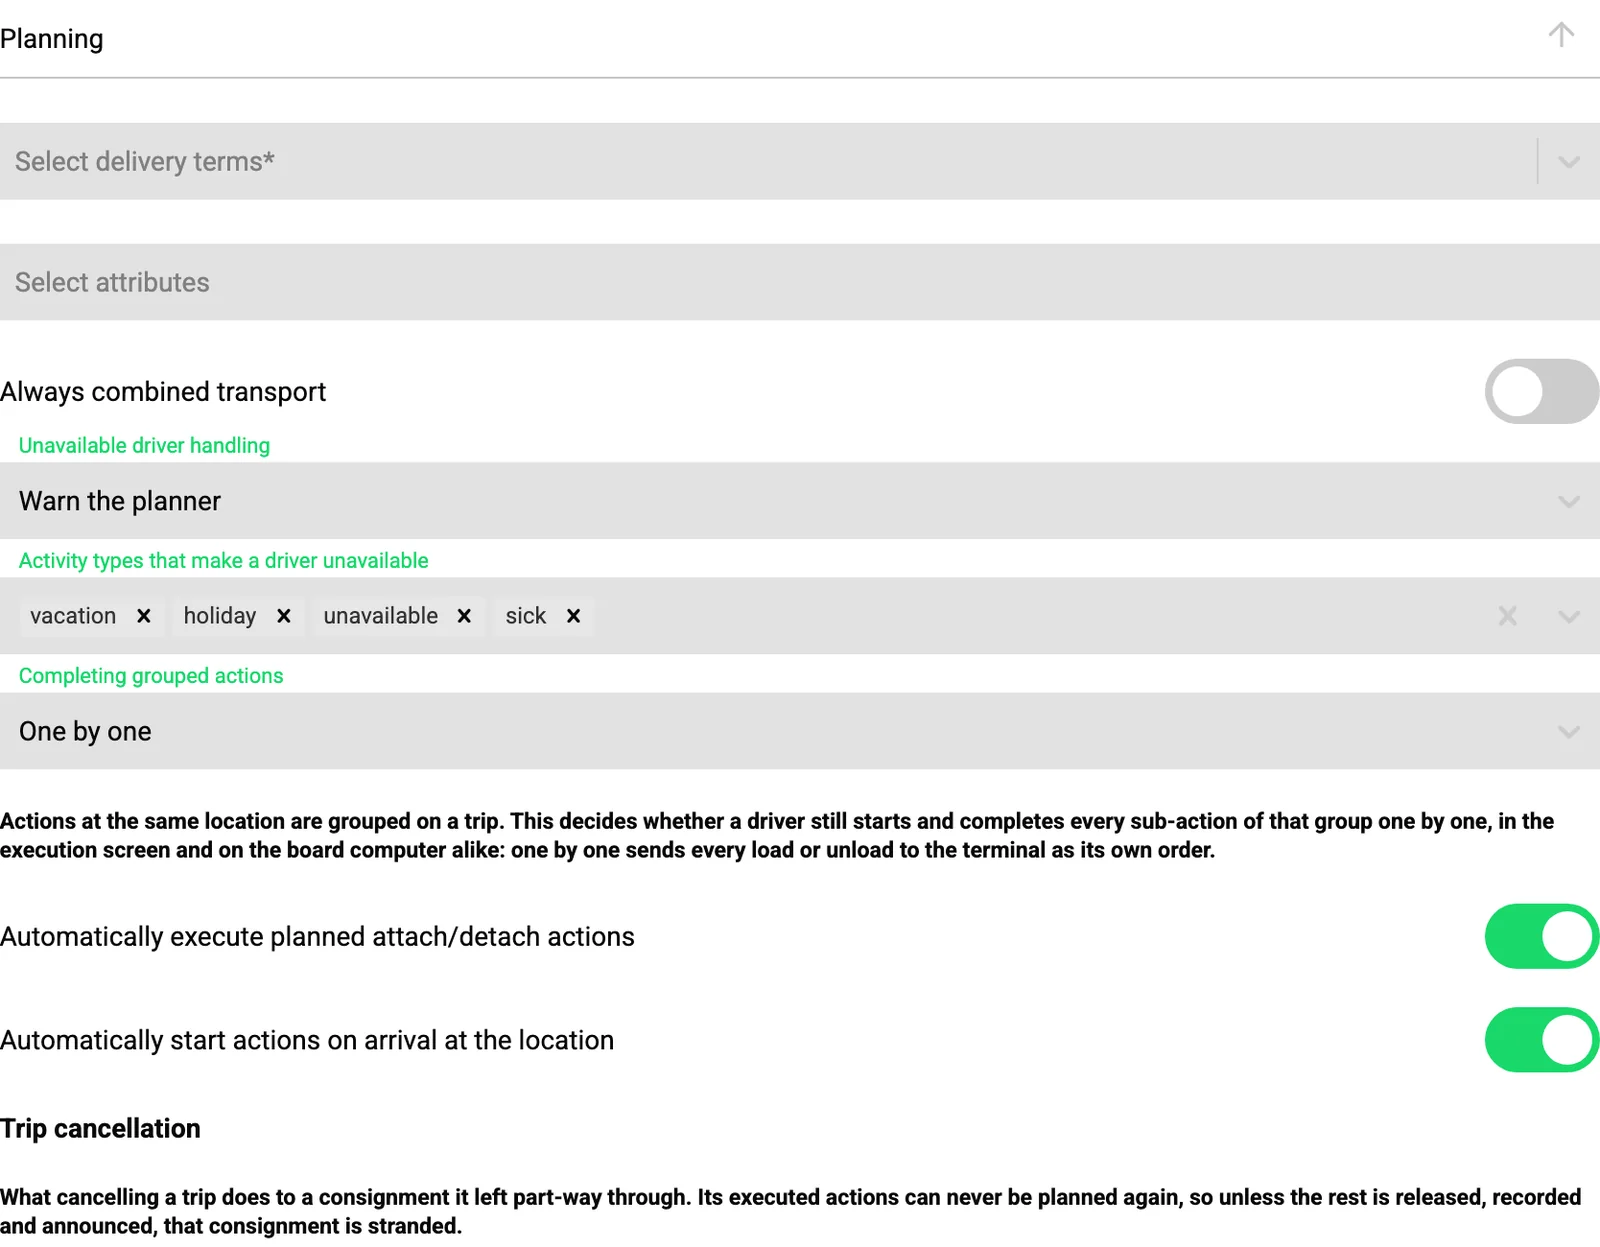
Open Planning. This is the largest section: it decides how planning and trip execution work for everyone.
- Default delivery terms and attributes shown on the shipment form.
- What happens when a planner assigns an unavailable driver: ignore, warn or block.
- Whether drivers complete grouped actions one by one or together.
- Automatic start and completion of actions, trip cancellation rules, exceptions, ETAs and driving hours.
Choose routing and cost calculation
Open Routing and choose the Routing Engine that calculates your routes, such as Transportial, PTV Developer, HERE or Google Maps.
Then decide which costs are calculated (toll, fuel, time and emissions, toll only or none) and when routes are recalculated: when the trip changes, on every save, or only manually.
All options in the help center →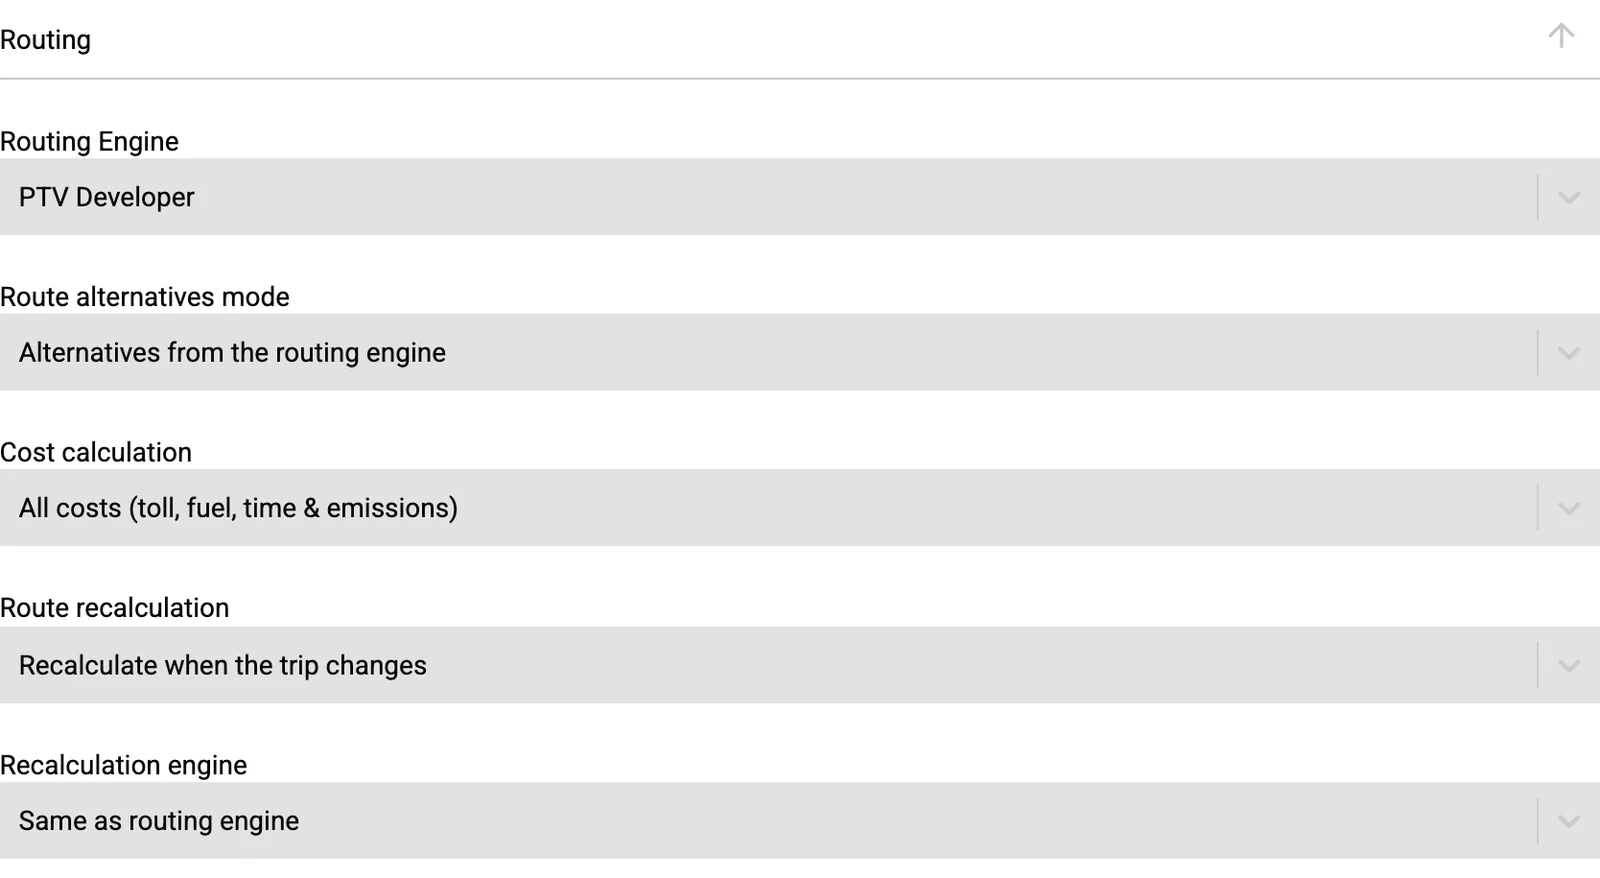
Pick your AI provider
Open AI and choose the AI provider (OpenAI, Google Gemini or Anthropic Claude) and, if you want, a specific model. It is used for every AI function, such as reading orders and invoices from documents.
Switch on Only use existing businesses and Only use existing locations if AI should never create new customers or addresses.
All options in the help center →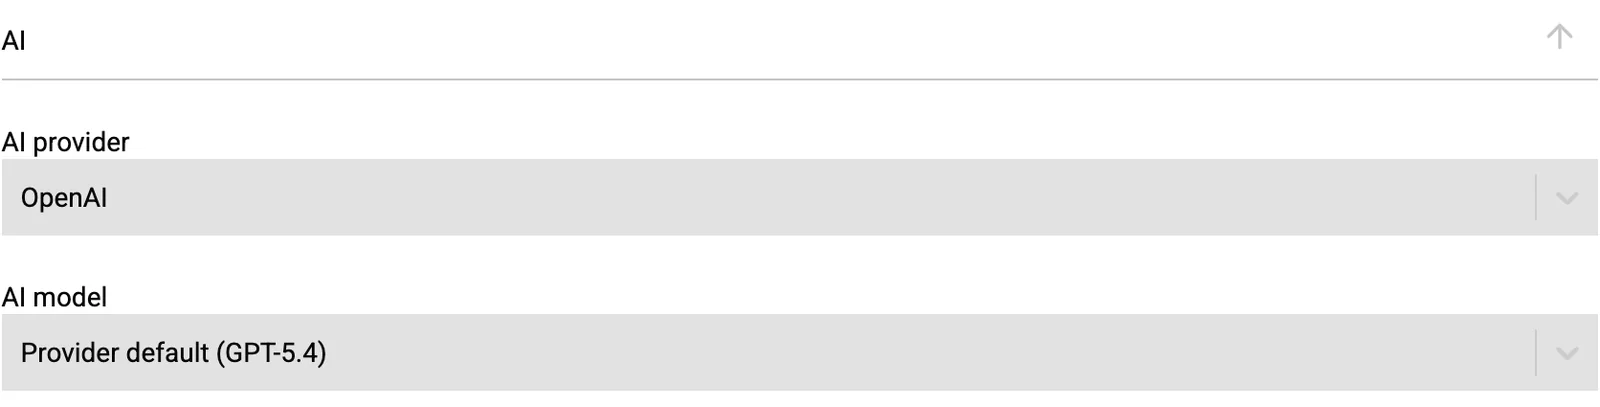
Open the customer portal
Open Customer portal and switch on Enable customer portal. Then choose what your customers see: orders, quotes, invoices, documents, live tracking, notifications, order requests, settings and chat.
Keep Location visibility in portal on Own locations only so customers never browse each other’s addresses, and anonymise other customers’ data on shared trips.
All options in the help center →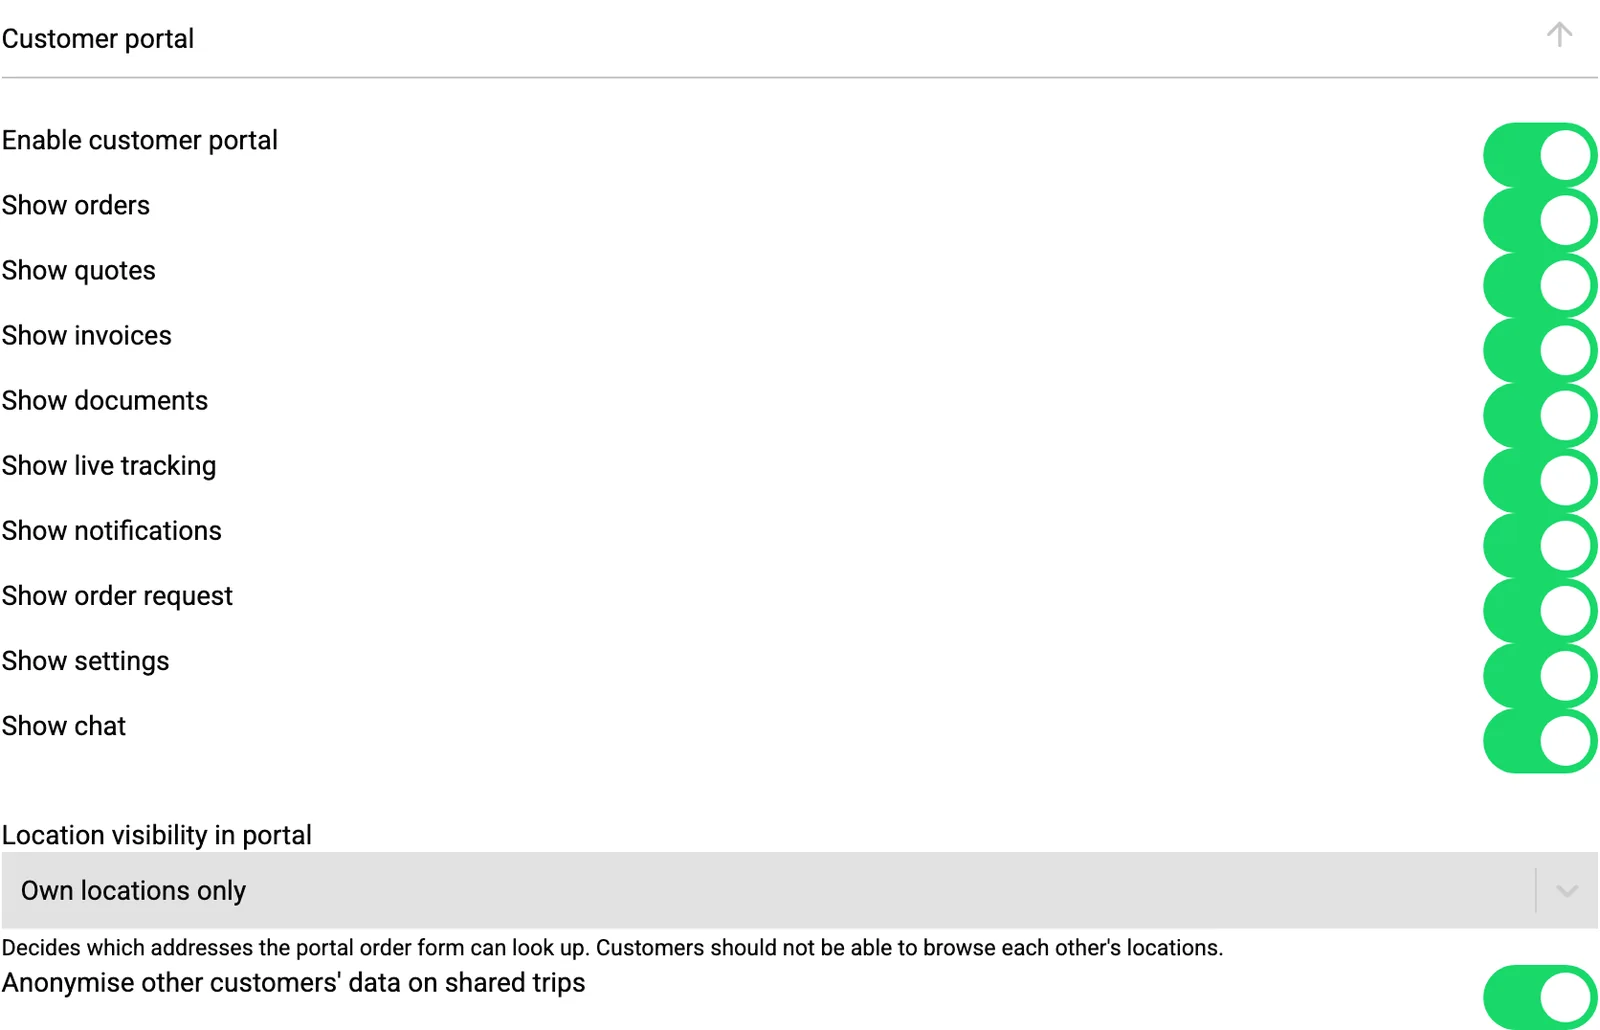
Save
Click Save at the bottom of the page. There is one Save for all sections, and changes only take effect after you click it. They then apply to everyone on the platform. If you leave the page without saving, your changes are lost.
All 24 sections at a glance
Everything you can set in Settings › Environment, in the order you find it on the page.
- Theme
- Primary and secondary colors for light and dark mode.
- Light theme logos
- Header logo, favicon, notification logo, full logo and login background.
- Dark themed logos
- The same five images for dark mode.
- General
- Email integration, switched-on functions and allowed sender email domains.
- Alerts
- Which conflict and capacity alerts are raised, optional checks and your own alert rules.
- Integrations
- Loop prevention and who is told when an integration or its test fails.
- Planning
- Default durations, driver availability, grouped actions, trip completion and cancellation, exceptions, ETAs and driving hours.
- Action Result Questionnaires
- The questions drivers answer when they complete an action, also generated with AI.
- Pricing
- Default driver and vehicle cost pricing for trip costs.
- Routing
- Routing engine, route alternatives, cost calculation, recalculation, optimizer and quote routes.
- Emissions
- Reporting standard (ISO 14083, GLEC or EN 16258) and well-to-wheel or tank-to-wheel.
- UI Settings
- Hidden and required fields, planboard colors, map layers, remembered filters, onboarding banner and setup wizard.
- Platform Label Configuration
- Your own words for labels in every language, and automatic chat translation.
- Region
- Units, currency, number, date and time formats, time zone and how stop times are shown.
- Financial
- Default tax rate, invoice approval flow and invoice visibility per team.
- AI
- AI provider and model, and whether AI may create new businesses and locations.
- Customer portal
- Whether the portal is on, what customers see and which addresses they can look up.
- Compliance
- Posting detection, cabotage alerts and certificate expiry warnings.
- Energy
- Automatic energy stops, safety margin, consumption and preferred providers.
- Bulk edit
- Whether planners may change many orders at once, and what they may change.
- Fleet management (FMS)
- Vehicle-issue alerts, fuel theft detection, sensors, geofences and tachograph times.
- Driving style
- Thresholds for harsh acceleration, braking, speeding and idling, and their score penalties.
- Chat
- Shared read status and how automatic status messages behave.
- Legal
- Who accepted the terms and conditions for your company, and when.
The Environment tab changes the platform for everyone. Personal preferences, such as your language, notifications, interface and your own region overrides, are in the other tabs of Settings and only affect you.
Frequently asked questions
Who can change the environment settings?
Internal users with role level 1000 or higher, usually the platform owner and administrators. Other users do not see the Environment tab.
Do changes apply straight away?
Yes, as soon as you click Save at the bottom of the page, for every user on the platform.
Can I run the setup wizard again?
Yes. Open it from Settings › Environment › UI Settings › Setup wizard. Restart setup clears only the wizard’s answers; everything it created is kept.
I do not see a menu item, such as Workflows. Why?
Some menu items only appear when their function is switched on. Check the functions in the General section, or the Features step of the setup wizard.
Can each user have their own units and time zone?
Yes. Each user can override the platform region in Settings › General › Region & formats, or follow the platform default.
Can I use my own logo and colors?
Yes. Set your colors in Theme and upload your logos in the two logo sections. They are used across the app, the login page and notifications.
Want help setting up?
Questions about a setting, or rather set it up together? Our team is happy to walk through your environment with you.